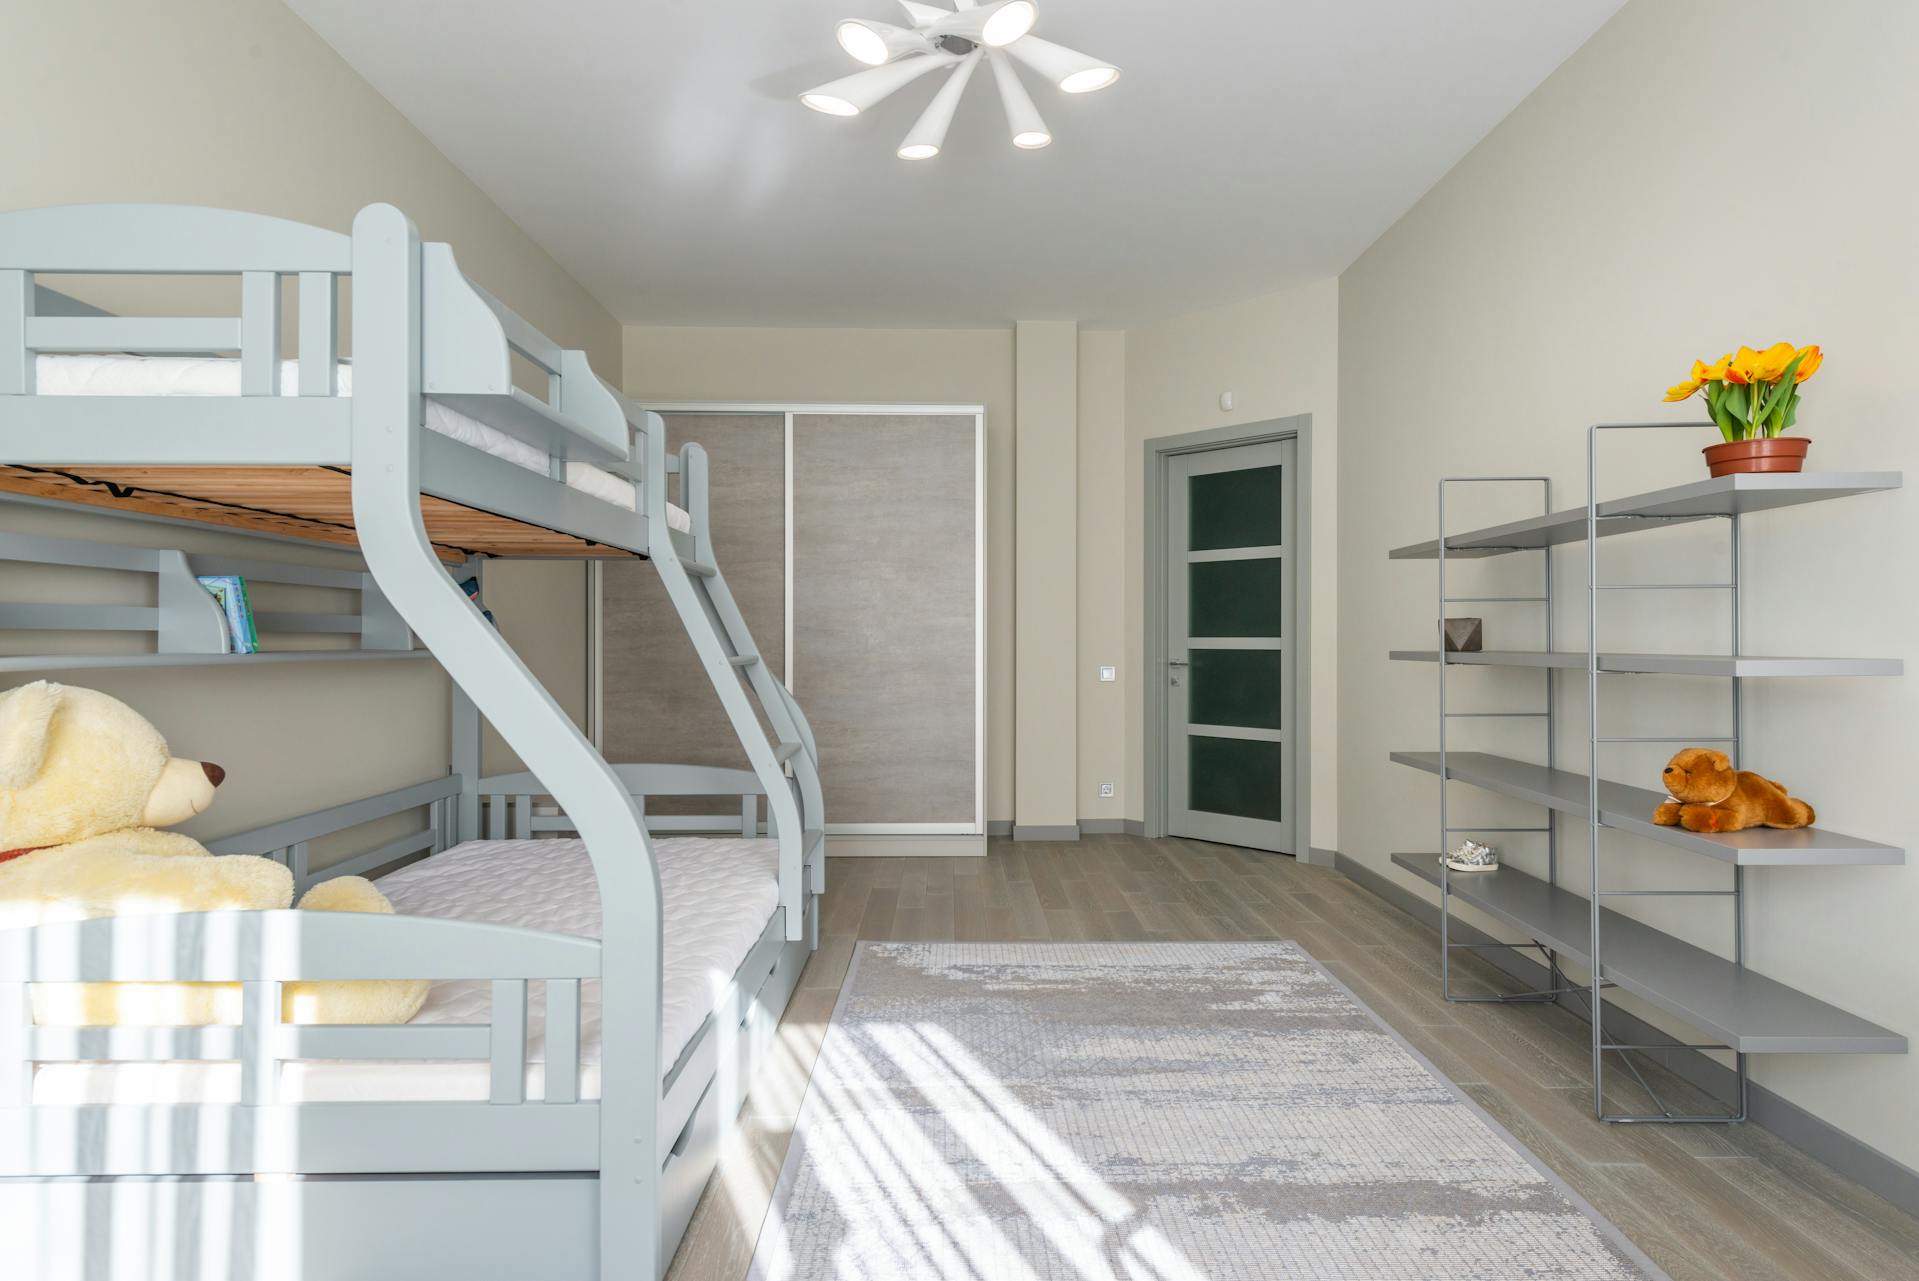
Hey friends! Caveman has been up to some amazing projects lately (like these cool DIY wall lamps), and I’m SO excited to share these toddler-size bunk beds with you. If you’ll allow me to brag on my oh-so-creative honey a little bit, you need to know a couple things. First, these modern space-saving and cost-effective bunk beds are unique because Caveman dreamed them up from scratch—like from his brain. Just like that. And then he designed them to scale and drew up a 3D sketch. Just like that. And then he made them. Just like that. As you can see, I’m pretty amazed at his handiwork. Our little critters are pretty thrilled with their new beds too. Secondly, you need to know that these plans are available for purchase. So if you like the idea of creating similar bunk beds, you can totally follow Caveman’s steps… which are what we’d like to share with you today. Click through to see Caveman walk through his basic method for building our unique toddler-size bunk beds (and more pictures!).
[Caveman here.] As you know, in a few months the Shoebox is about to become a little more crowded. With #3 coming in February 2014, we have less than 10 weeks to prepare for her arrival. This means rearranging the kids’ bedroom to fit three children. Floor space is (very) limited, so the only way to accommodate two toddler beds (remember the one we refinished?) and a crib is to go vertical (i.e. bunk beds.) We searched online quite a bit looking for bunk beds that fit a toddler-size mattress, and you know what we found? Nothing. (They don’t really exist unless you want to pay a TON of money, which obviously we don’t.) That’s when I heard the sound of opportunity knocking.
Now for those of you who don’t know me, I’m big into the DIY (do-it-yourself) scene. My favorite saying according to my wife is “I can build that.” Usually my wife is the voice of reason with questions like, “How much will it cost? What’s your time frame? Can I see your plans? Where are you going to build this?” Sometimes I dislike her very much for destroying my brilliant schemes with common sense, but I wouldn’t have it any other way. She grounds me. That being said, this time I had all my ducks in a row for toddler size bunk beds. I designed plans (in 3D), the cutting layout (w/ dimensions), the cost estimate, and the time and place to build it. And you know what? This amazing thing happened…. she said “OK”!
I do have to give a shout-out though to a good friend Jeff, owner of Greys River Custom Construction, for the use of his personal shop. Although I had planned to build this at the Shoebox with a circular saw and router (which is doable) and my other personal tools, it was much more efficient to have the use of a table saw and router table at my disposal also. [Thanks Jeff!]
With the “OK” from the wife the work began. First, I purchased the materials. The final cost to make the bed was just above $300. Here is my supply list and prices:
3- 3/4″ plywood sheets [$60/sheet] = $180
4- 6 ft 1×2 boards= $13
1 lb box of 1-1/4″ screws= $7
3″ screws= $7
wood glue= $3
jig saw blades= $13
3″ hole saw bit= $22
paint/ painting supplies (plus sample colors) = $60
TOTAL= $305 &18 hours of labor
Step 1:
Pencil the plan to create cut marks on 3/4″ plywood. Cut sheets of plywood into smaller, more workable pieces once you have the design drawn on the boards. (Some of this excess will be used later to cut the mattress slats.)
Step 2:
Using a drill and a 3″ hole bit, cut the ends of the ladder rungs—this method enabled a near-perfect curve for each step. From there, it was easy to use a jig saw to complete each ladder step.
Step 3:
After all the cuts were made on each piece, I used a router with a 1/4″ round-over bit to take off the majority of the sharp edges and splinters. Then I finished the edges off with sandpaper to achieve smooth, rounded fillets.
Step 4:
Ledger boards on the four sides hold the mattress slats. I used 1-1/4″ screws and wood glue to attach the 1×2 pine boards to the insides of the bed.
Step 5:
Nothing special here, if you’re used to woodworking. I cut pieces to length and width to create the mattress slats. I ran a router briefly over the edges to eliminate really rough sides.
Step 6:
After getting the bed clamped together, I drilled pilot holes and painted the bed. For final assembly, each edge received four 3″ screws.
What do you think? Fun, huh? Remember, if you’re interested in seeing more detailed plans, write me at evelyn{at}smallishblog.com. Thanks for joining us today!
Oh and by the way…
**Disclaimer: Some rights reserved. For private use only. Plans from this page are not to be used for commercial purposes or republished without the express written consent of Evelyn Rennich/Smallish Blog. While we do our best to provide clear plans, we cannot guarantee each plan or step for complete accuracy. If you choose to attempt a similar project, you are building at your own risk. Using plans or information found on Smallishblog.com indicates that you agree with the Terms of Use policy and will accept full responsibility for the process and outcome of any project you attempt. It is always a good idea to have a complete understanding of how the project works before beginning to build. Feel free to link to any projects from Smallish as long as you provide an adequate link back to the appropriate post.